
Why Smart Lock Module Installation Is the Smartest Upgrade You Can Make Right Now
Smart lock module installation is one of the fastest ways to add keyless, app-controlled access to your home or rental property — without replacing your entire lock.
Here’s a quick summary of how it works:
- A smart lock module is an add-on that slots into your existing lock to give it Bluetooth, Wi-Fi, or Matter connectivity.
- You keep your current lock body — the module simply gives it a digital brain.
- Installation takes under an hour for most standard deadbolts and mortise locks.
- After physical installation, you pair the module to a mobile app to manage access, PINs, and activity logs.
- Backup access (physical key, emergency USB-C, PIN code) should always be set up as part of the process.
The smart lock market is growing fast — projected to climb from $2.41 billion in 2023 to over $10 billion by 2030. It’s not hard to see why. Over 60% of smart lock users report easier access management, and 75% of rental hosts say remote access via a smart module is essential to how they run their properties.
But here’s the thing: a poorly installed module is worse than no module at all. Misalignment, skipped calibration, or the wrong module for your lock type can leave you locked out — or worse, leave your door unsecured.
This guide covers everything you need to get it right the first time — from checking compatibility and gathering tools, to step-by-step installation, app setup, and troubleshooting. Whether you’re a Gold Coast homeowner, a landlord, or an Airbnb host, you’ll know exactly what to do (and when to call a professional).
Smart lock module installation terms to know:
What a Smart Lock Module Is and When It Makes Sense
A smart lock module is a retrofit component that adds digital features to a compatible lock you already own. Depending on the brand, that module may provide Bluetooth, Wi-Fi, Thread, Matter compatibility, app control, user management, activity logs, and remote access.
In plain English: instead of ripping out the whole lock, you add the part that makes it smart.
This approach makes sense when:
- your existing lock is in good condition
- your door is already properly aligned
- the lock brand offers an approved module for your model
- you want less drilling, less mess, and usually a lower upgrade cost
- you need better access control for family, tenants, cleaners, or guests
It is especially useful for rentals and Airbnb-style properties across the Gold Coast, Tweed, Currumbin, Burleigh, Elanora, Tugun, Miami, and Northern NSW, where changing codes is much easier than chasing keys.
How smart lock module installation differs from replacing the whole lock
The biggest difference is that a module retrofit reuses the main lock hardware.
With a full smart lock replacement, you usually remove the old lock body and fit a completely new smart unit. With smart lock module installation, the lock body often stays in place and you install the module into a dedicated compartment, behind the inside escutcheon, or onto the interior side of the existing cylinder or thumbturn.
Benefits of a module retrofit include:
- less door modification
- faster installation
- lower risk of cosmetic damage
- easier upgrades on newer compatible locks
- simpler reversibility for some rental situations
The trade-off is compatibility. A full replacement can fit many standard doors. A module only works when the lock was designed to accept it.
Lock types that can support a module retrofit
The most common compatible lock types are:
- mortise locks
- single-cylinder deadbolts
- euro cylinder doors
- multipoint locks
- motorised locks
Examples from current market support include:
- Yale locks that accept Yale smart or access modules
- retrofit-style Aqara solutions for supported euro profile, select Scandi, and some US deadbolt formats
- FUHR motorised multipoint locks that accept the SmartAccess module
- some eufy products are full-lock installs rather than simple module inserts, so always check whether you are buying a module upgrade or a complete lock set
That last point matters. Not every “smart lock upgrade” is a true module retrofit.
Compatible modules and smart home ecosystems to look for
When comparing products, look for:
- app support and easy pairing
- Bluetooth for local control
- Wi-Fi for remote control
- Matter or Thread for broader smart home compatibility
- hub requirements, if any
- backup entry methods
- approved compatibility with your exact lock model
Yale module support can vary by lock family, and the brand provides setup help through Yale Home Module Support, How to Install a Yale Smart Module, and How to Install: Connected by August / Yale Access Module. FUHR provides a detailed wiring and setup manual in SmartAccess. Aqara provides lock-specific guidance in its user manual here.

Check Compatibility Before You Start
Compatibility is where successful installs are won or lost. If the lock, door, cylinder, and app ecosystem do not match, no amount of optimism or screwdriver confidence will save the day.
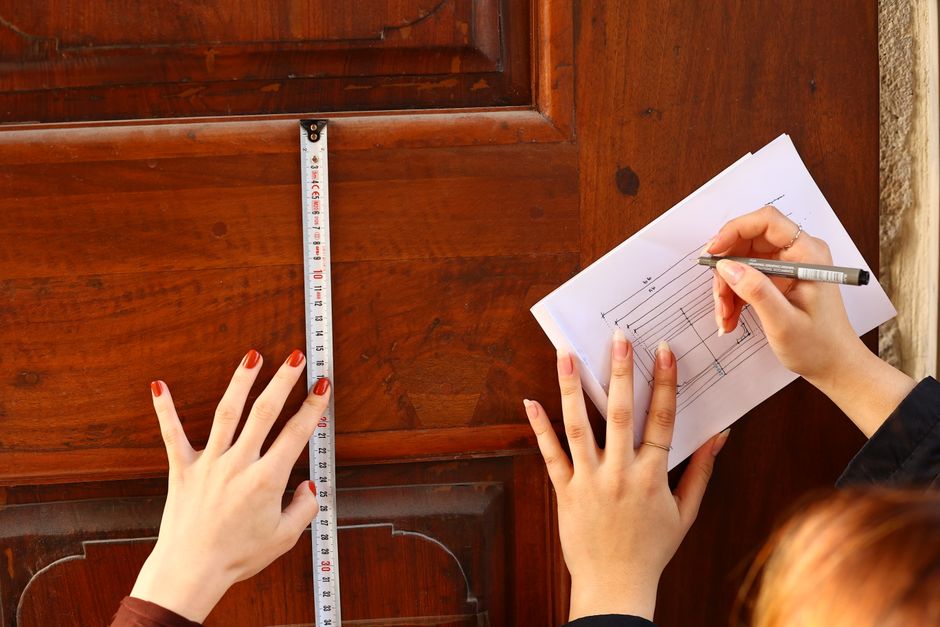
Door and lock measurements to confirm before smart lock module installation
Before buying or opening anything, confirm:
- door thickness
- backset
- handing
- cylinder type
- tailpiece shape and length
- spindle size
- latch or bolt depth
- strike alignment
- clearance between the interior lock and nearby trim or glass
- whether the door and frame close squarely without rubbing
For some deadbolt-style installs, standard measurements matter a lot. Product guides for smart lock hardware commonly reference door thickness around 35 mm to 55 mm and backsets of 60 mm or 70 mm. On retrofit cylinder systems, you may also need to confirm how far the cylinder protrudes and whether the key or tailpiece sits within the module’s supported range.
For euro cylinder retrofits, one very important requirement is an emergency-function cylinder. That allows operation from one side even if a key is inserted on the other side. Without that feature, some retrofit modules simply will not work correctly.
Existing hardware, power, and network requirements
Also check the technical side:
- Does your lock already contain a module?
- Does the new module require batteries, and what type?
- Is there enough internal space behind the cover?
- Does the module rely on Bluetooth only, or also Wi-Fi?
- If it supports Matter over Thread, do you have a compatible controller and Thread border router?
- If the lock uses Wi-Fi, is your network 2.4 GHz available?
- Is signal strength strong enough at the door?
- Does the lock offer emergency power, such as USB-C contact charging?
Some systems are battery-powered only. Others, like certain motorised multipoint locks, may have wiring requirements. FUHR’s SmartAccess module, for example, integrates with supported motor units and has specific terminal connections and setup steps.
Metal doors can also reduce signal performance. In some systems, manufacturers specifically note that radio reception may need extra thought if the lock is mounted on a metal door or enclosed profile.
Permissions and use-case checks for homes, apartments, and rentals
If you own the property, compatibility is mostly a hardware question. If you rent, live in a unit, or manage short-stay accommodation, it is also an approval question.
Check:
- landlord approval
- body corporate rules
- whether the lock change affects common property
- whether the install is reversible
- whether guest PINs and audit logs are needed
- what backup entry will be used if batteries fail
Before going ahead, it is worth reading More info about 5 Things to Know Before Your Electronic Security Installation.
Tools and Prep Work for a Smooth Installation
Most module installs do not require a workshop full of tools. Usually, a small kit and a bit of patience are enough.
Typical tools and items include:
- Phillips screwdriver
- small hex key or included tool
- batteries
- smartphone with the correct app installed
- cleaning cloth
- good lighting
- the product manual
- your physical key or existing access credential
For some products, a PH1 screwdriver is specifically recommended. For others, the manufacturer includes the needed tool.
What to do before removing any cover or insert
Before touching the lock:
- Read the manufacturer instructions fully.
- Confirm the exact lock model and supported module.
- Download the app and create your account.
- Charge your phone.
- Check for any firmware or app notes.
- Unlock and open the door.
- Test the lock manually with the thumbturn and key.
- Photograph the current setup, especially if wiring is involved.
- Remove or disable old digital access if upgrading from an earlier module.
Always keep the door open during installation and first-time setup. That way, if something goes sideways, you are inconvenienced, not sleeping on the patio.
How to prepare if a module is already installed
This is a very common situation during upgrades.
If a module is already present:
- check the model number of the existing module
- confirm whether the new module is a replacement or a different ecosystem add-on
- follow the removal instructions in the product guide
- unpair or remove the old device from the app first if required
- factory reset the lock only if the manufacturer calls for it
- install only one module at a time
Many brands follow a one-module rule. In other words, if one module is already in the lock, remove it before fitting another. Yale guidance commonly reflects this upgrade path, and you can review How to Install a Yale Smart Module for brand-specific reference.
Safety and security steps before first setup
Before initial pairing:
- keep the physical key handy
- confirm emergency access works
- do not close the door until setup and testing are complete
- verify batteries are fresh
- make sure everyone in the household knows the lock is being worked on
- set up at least one backup method before relying on app access
That backup might be a key, PIN, fingerprint, emergency USB-C charge point, or another admin credential depending on the product.
Step-by-Step Smart Lock Module Installation
The exact steps vary by brand, but the workflow is very similar.
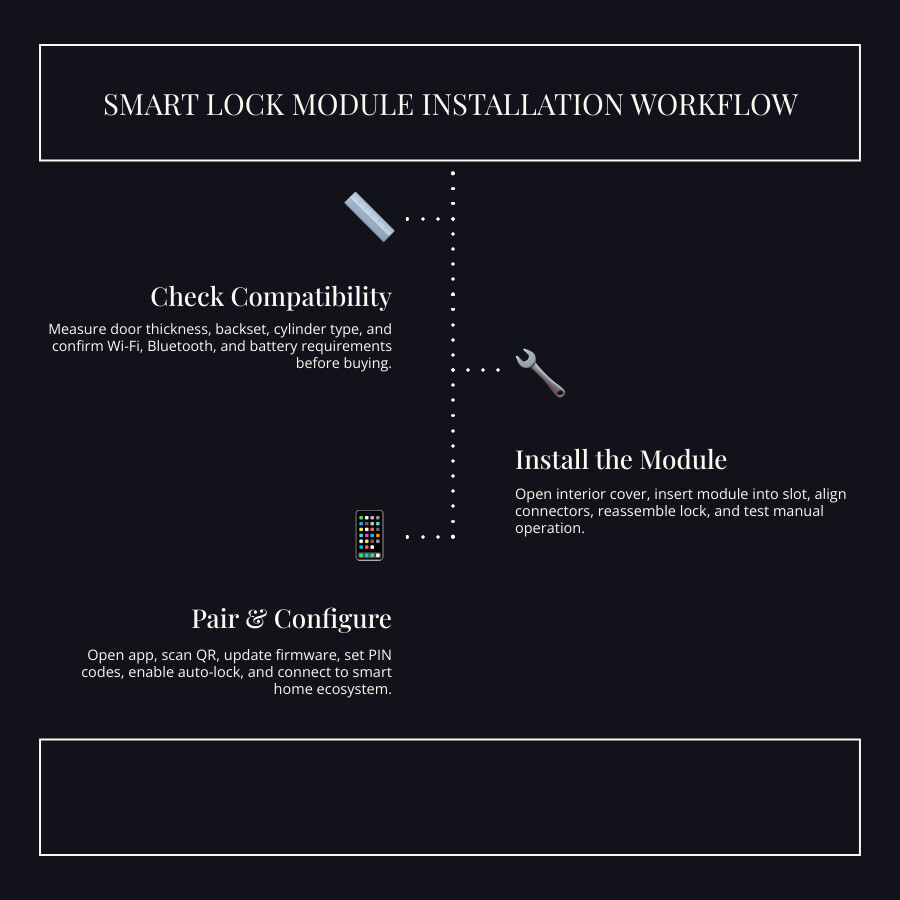
Step 1: Open the interior side and access the module slot
Start from the inside of the door.
- Open the door fully.
- Remove the battery cover or interior escutcheon cover.
- If needed, remove the batteries first.
- Locate the module bay, connector area, or mounting point.
- Check for any existing module, loose wiring, or protective insert.
Take your time here. Covers can be clipped, screwed, or slid off. Forcing the wrong panel is a classic way to turn a 20-minute job into a “why is this piece in my hand?” moment.
Step 2: Insert or connect the module correctly
Now fit the module according to the lock design.
Common actions include:
- align tabs or guide rails
- orient the connector pins correctly
- press until it clicks into place
- connect wires to the correct terminals if required
- fit the correct adapter for your cylinder or tailpiece
- secure the module with screws or adhesive if the system uses a rear motor pack
For example:
- Yale-style modules often slide into a designated slot in the interior assembly
- retrofit cylinder drives like Aqara may require selecting the correct adapter and either screw mounting or adhesive mounting depending on cylinder protrusion
- FUHR SmartAccess systems can require specific wire connections to motor terminals before testing
Use the manufacturer documentation where needed:
- SmartAccess
- How to Install a Yale Smart Module
- How to Install: Connected by August / Yale Access Module
- QUICK START GUIDE
Step 3: Reassemble the lock and test manual operation
Before pairing the app, reassemble enough of the lock to test the mechanics.
Check that:
- the thumbturn moves smoothly
- the deadbolt extends and retracts fully
- the latch does not scrape
- nothing binds when the door is open
- the strike lines up when the door is gently closed
If the lock is stiff now, do not assume the app will fix it. Smart features cannot cure a misaligned strike plate.
Step 4: Calibrate and pair the module in the mobile app
Once the module is physically installed:
- Reinstall batteries if removed.
- Put the lock into pairing mode.
- Open the app and add the device.
- Scan the QR code if required.
- Stay close to the lock with Bluetooth enabled.
- Complete any firmware update offered.
- Name the lock clearly.
- Run calibration so the lock learns locked and unlocked positions.
- Create the first admin user.
Aqara, Yale, and FUHR all provide app-led setup paths, but they differ in detail. Some modules use Bluetooth first and Wi-Fi later. Some use Matter pairing to connect with third-party ecosystems. Others require test mode before final operation.
If your lock supports Matter or Apple Home features, check that you also meet ecosystem requirements before starting.
Step 5: Connect smart home features and backup access
After pairing, configure the practical stuff:
- PIN codes
- fingerprint users
- family access
- guest or cleaner access
- auto-lock timing
- activity logs
- notifications
- remote unlock if supported
- physical key backup
- emergency charging option if available
For rental and Airbnb use, time-limited access is the star feature. You can create a code for a guest, set it to expire, and revoke access without changing hardware. That is a huge upgrade from “the spare key is under the pot” security.
Troubleshooting and Lock-Type-Specific Tips
Even a correct smart lock module installation can hit a few bumps. Most issues come down to compatibility, alignment, power, or setup order.
If the module will not pair or connect
Try this checklist:
- confirm the lock and module are actually compatible
- make sure Bluetooth is on
- allow the app all required permissions
- stay close to the door during pairing
- confirm the Wi-Fi network is 2.4 GHz if required
- reboot the lock by removing and reinserting batteries
- check whether another user account still owns the lock
- update the app
- remove any old module from the lock
- factory reset only as a last resort, following the manual
If signal is weak, move closer and test again. If the door is metal or enclosed by heavy framing, radio performance can also be affected.
If the lock jams, misreads status, or fails calibration
This usually points to a mechanical issue.
Check for:
- door sag
- strike misalignment
- bolt friction
- wrong lock handing in app settings
- insufficient latch hole depth
- loose interior mounting
- an incorrect adapter on retrofit cylinder systems
If the bolt does not move freely by hand with the door open, stop there and fix the mechanics first. Then recalibrate.
Installation differences for mortise, deadbolt, and multipoint locks
Different lock types need different attention:
- Mortise locks: often have model-specific module bays and may need careful handling of internal components.
- Deadbolts: usually focus on backset, bore size, door thickness, and tailpiece alignment.
- Multipoint locks: can involve motor units, profile cavities, wiring, and more complex commissioning.
- Euro cylinder retrofits: depend heavily on emergency-function cylinders and the right adapter.
- Adhesive vs screws: some retrofit drives use screws when the cylinder protrudes enough, and adhesive when it does not.
That is why lock type matters just as much as brand.
When DIY stops being worth it
DIY is fine for straightforward, approved, compatible installs. It stops being worth it when:
- the lock needs wiring
- the frame is misaligned
- the door drags or binds
- the property is an apartment with compliance concerns
- the lock has already been modified
- the module will control important guest or tenant access
- reliability is more important than saving an hour
If you are unsure, start with More info about How to Install a Smart Lock the Right Way.
Smart Lock Module Security, Access Management, and Next Steps
A smart module is not just a gadget upgrade. It changes how access is managed day to day.
Done properly, it can improve:
- code sharing
- audit visibility
- cleaner and contractor access
- remote revocation
- guest turnover
- household convenience
- accountability for who entered and when
Best practices for families, rentals, and Airbnb-style properties
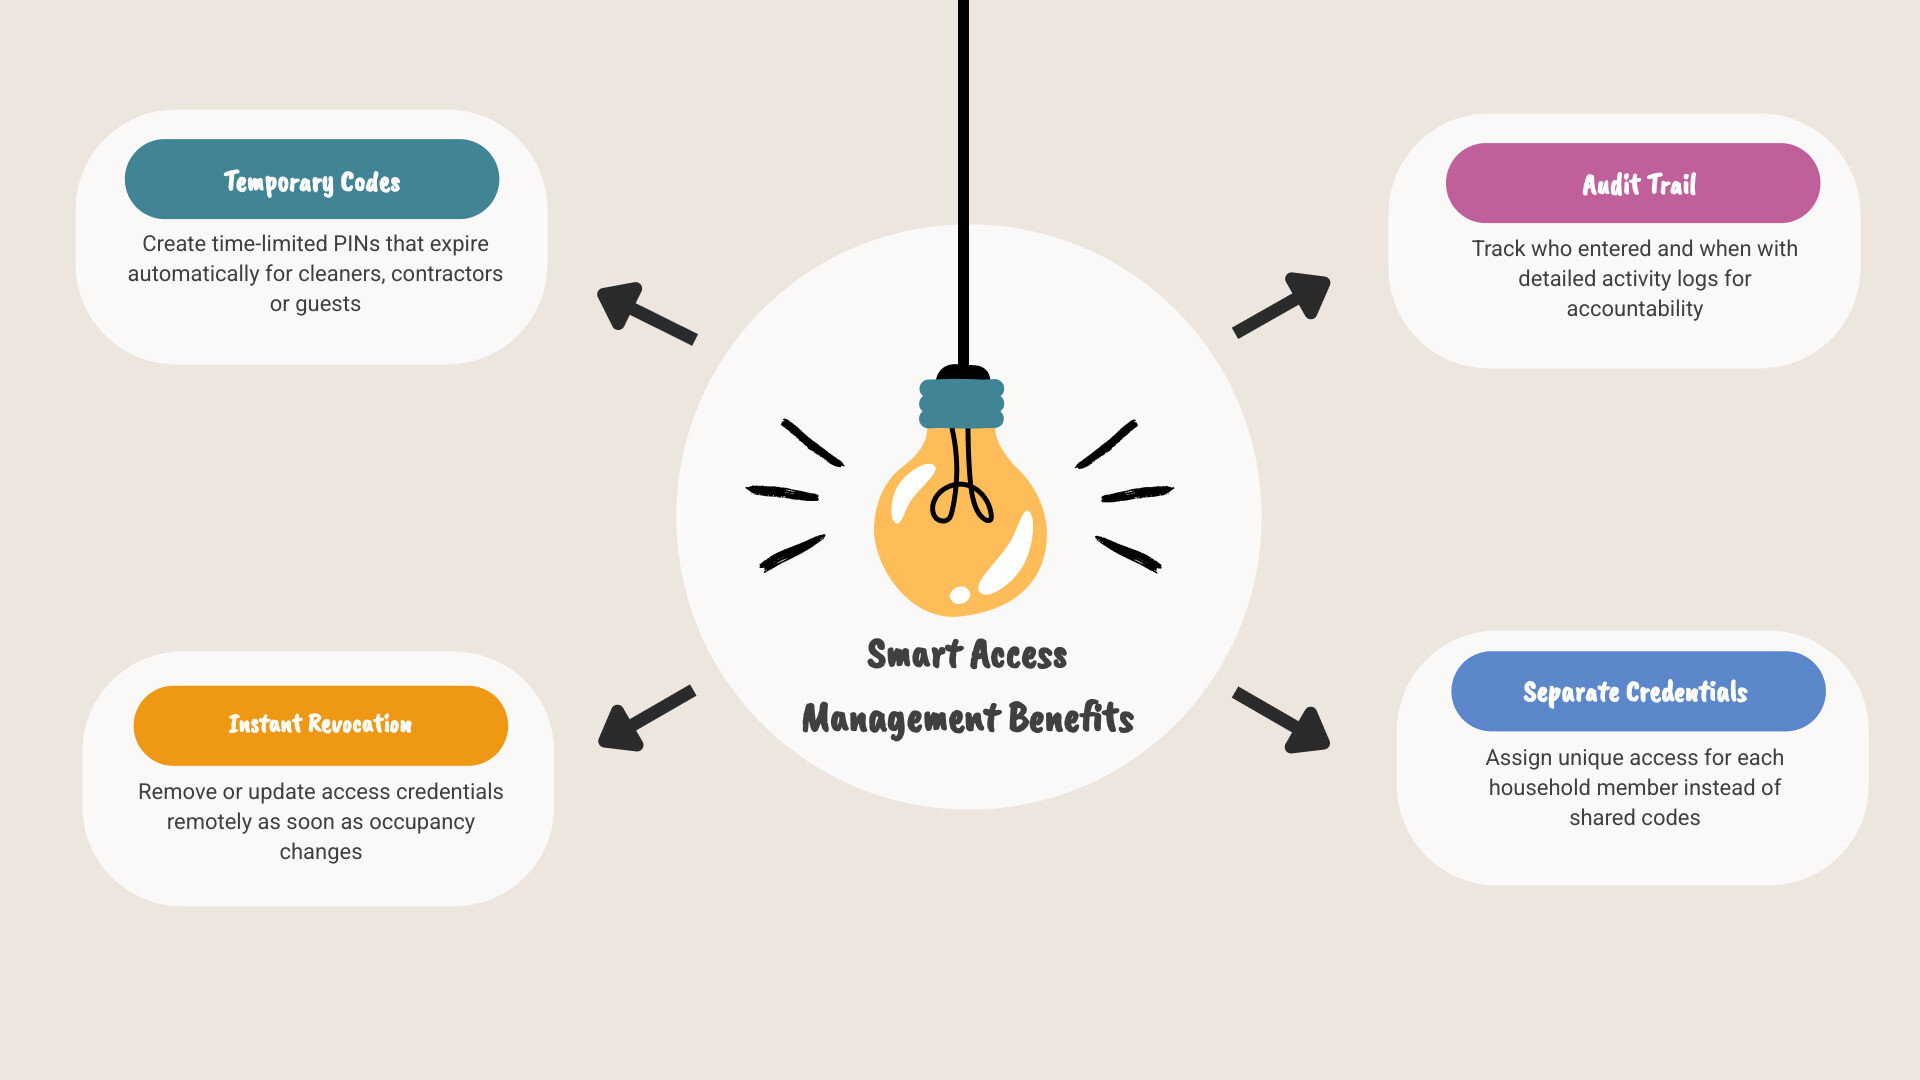
For households, assign separate credentials instead of sharing one code. For rentals, create temporary access that expires automatically. For holiday properties, change or revoke access as soon as occupancy changes.
Best practices include:
- unique PINs for each user
- time-limited guest codes
- separate cleaner and contractor access
- instant revocation after checkout
- low-battery alerts enabled
- physical backup credentials stored safely
- audit log review after incidents
This is where the stats make sense in real life. Over 60% of smart lock users report easier access management, and 75% of rental hosts using Wi-Fi or Bluetooth-enabled smart access rely on remote management for smoother turnover.
Should you hire a professional for smart lock module installation?
In many cases, yes.
Research shows professional smart lock installation can reduce failure rates by up to 40% compared with DIY setups. That is not surprising. A professional checks door alignment, lock compatibility, calibration, app setup, backup access, and long-term reliability, not just whether the module clicks into place.
At Palm Beach Locksmiths, we help customers across the Gold Coast and surrounding areas choose the right smart solution for the door they already have, not the one the box imagines they have.
Professional installation is especially smart when:
- the lock is part of a rental workflow
- access reliability is critical
- the door has alignment issues
- the lock is a mortise or multipoint system
- you want secure setup from day one
Final checklist after installation
Before you call the job done, test everything:
- app lock and unlock
- physical key override
- PIN or fingerprint access
- auto-lock timing
- activity log visibility
- notifications
- low-battery alerts
- emergency charging method
- admin and guest user roles
- firmware update status
- smooth locking with the door closed
If any method fails, fix it now while the tools are still out.
If you would rather get it installed properly the first time, we can help. For more on professional setup, visit More info about smart lock installation services.
Whether you are upgrading your home, fitting out a rental, or improving guest access in an Airbnb-style property, a careful smart lock module installation gives you the best of both worlds: the lock you already trust, with the digital control modern life demands.